Please follow the steps below to access and send OAuth links within Matrix:
Accessing OAuth via Webadmin:
Navigate to the Webadmin Accounts section in Matrix.
Locate the email address associated with the account you need to access.
Check the box to the right of the green OAuth button for that email.
Click the green OAuth button.
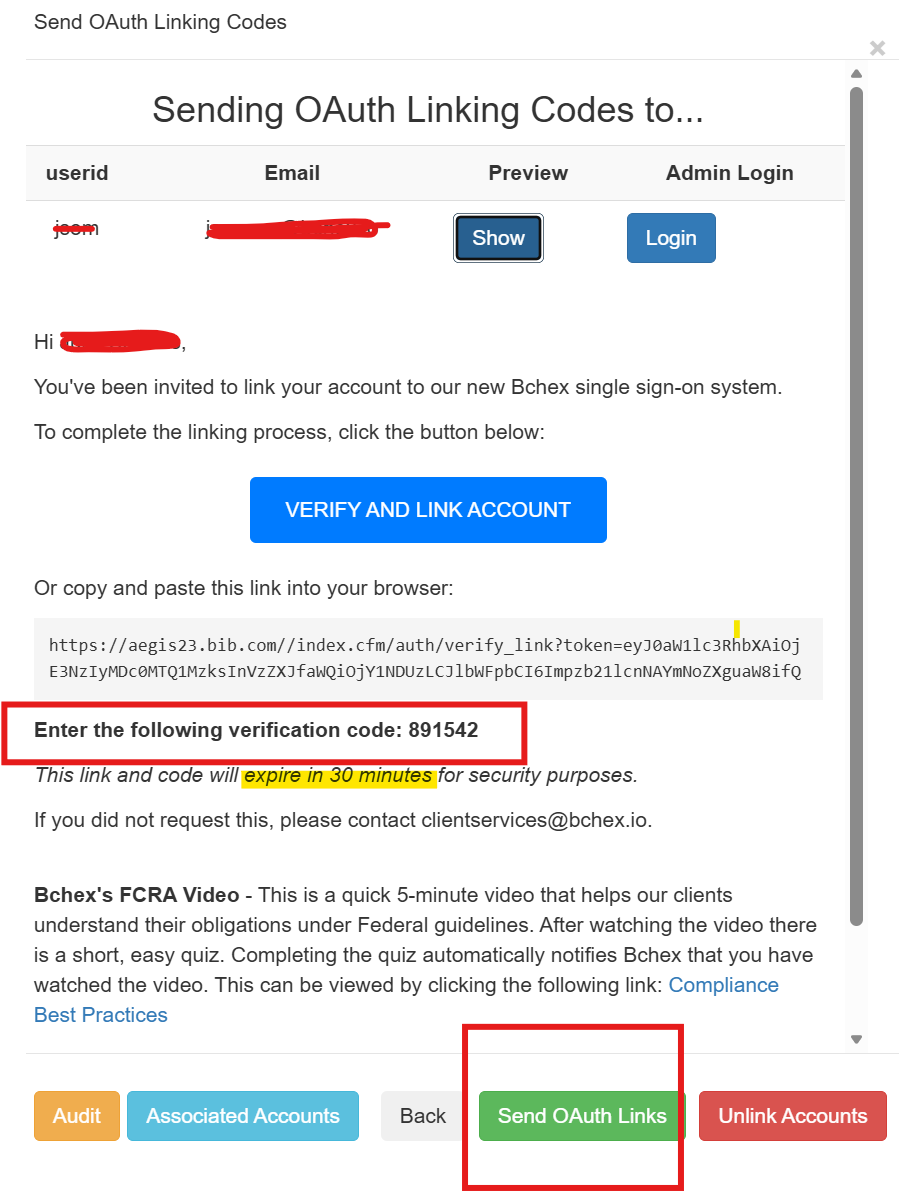
A message box will appear, as shown in the reference image below.
You will be able to access the user's account by clicking on the blue "Login" button.

Sending an OAuth Link to a User:
If a user is experiencing issues linking their account or is not receiving the OAuth email, you may manually send a new link by following these steps:
Click the green Send OAuth Links button.
The system will send the user a login link containing a 6-digit code.
The user will have 30 minutes to use the link and log into their account before it expires.
If the user has any issues receiving the email with the OAuth link then you also have the ability to copy and paste the link and verification into a message in FreshDesk and send it to them. Keep in mind that every time you hit "Show" to preview the link and verification code a different code will generate.
Additionally, you can also complete the verification for the user and link their account by using the blue "Verify and Link account" button and the verification code.
Was this article helpful?
That’s Great!
Thank you for your feedback
Sorry! We couldn't be helpful
Thank you for your feedback
Feedback sent
We appreciate your effort and will try to fix the article