TABLE OF CONTENTS
- Background Check Orders
- Searching
- Advanced Search - Creating a Filter
- Folder Color Indication
- Status
- ETA Tool
- Sorting
- Hiding
- Viewing Results
- Making Decisions
- Where to Upload a Document
- Finding an Authorization/Release Form
- Applicant Actions
- Secure Volunteer/Secure Applicant Actions
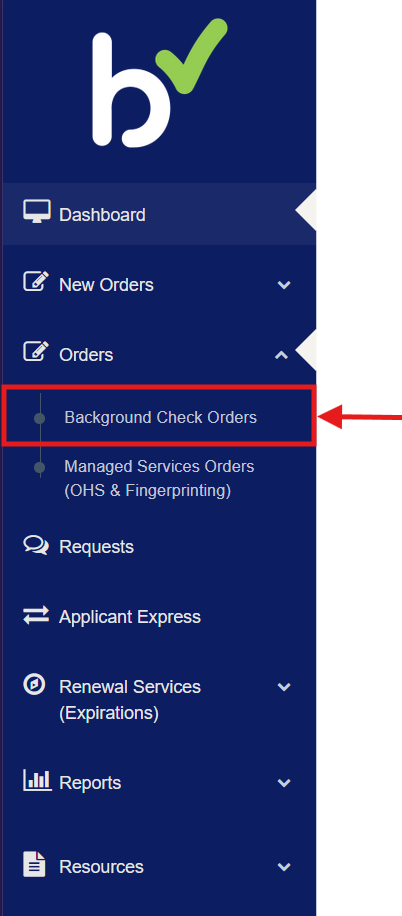
Background Check Orders
To view the progress of current or past background check orders:
Use the left navigation panel.
Click Orders > Background Check Orders.
Note: Depending on your account setup and subscribed services, you may not see every option displayed.
Searching
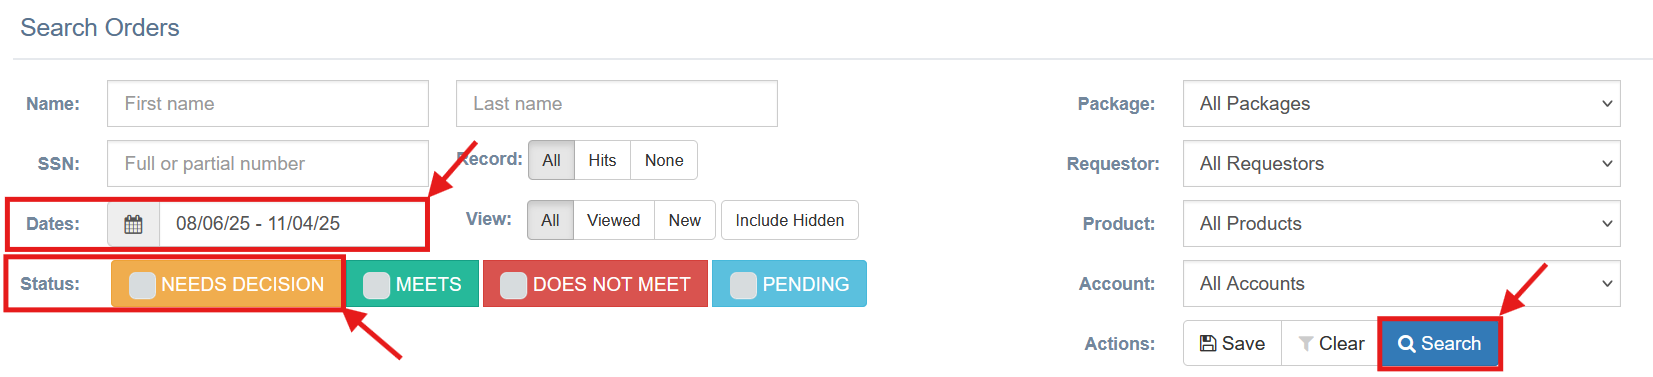
You can refine your search results in several ways.
By default, the date range is set to the last 90 days.
To search outside this range, click the date field and adjust as needed.
To search for all historical records, choose “Clear.”
You may also filter by Status and other available fields.
Once your parameters are set, click Search to display results.
Hint: If you are still unable to find the order you are looking for, make sure to choose the View Option "Include Hidden" to show any orders that were marked as Hidden

Advanced Search - Creating a Filter
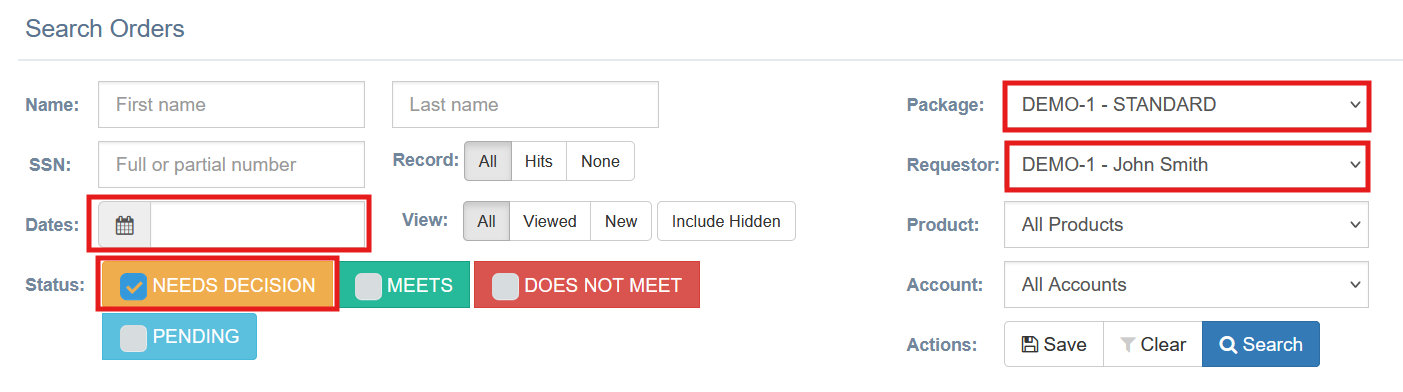
If you regularly use the same search parameters, you can save them as a Filter.
Select your desired parameters (e.g., clear date range, choose Status = “Needs Decision,” Package = “Standard,” Requestor = “Mary Smith”).
Click Search to view results.
Click Save to create your custom filter.
You may name your filter anything you like and even set it as your Default Filter for future sessions.
If you commonly use the same search parameters, you can save this as a filter, shown below.
In this example I have chosen to clear the date range, Status is “Needs Decision,” Package name is “Standard,” Requestor is “John Smith.”

Folder Color Indication
The color of the folder icon next to each applicant’s name provides a quick status reference. This feature is not yet available in all accounts.

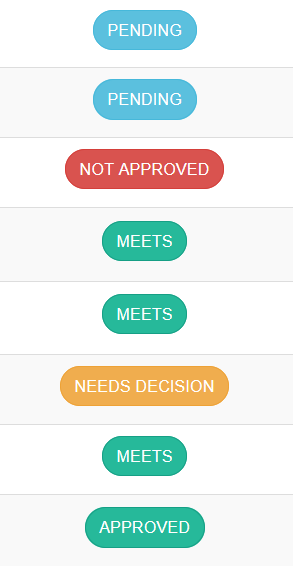
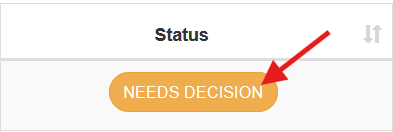
Status
- Needs Decision – The background check is complete and is awaiting your decision.
- Pending – The background check is currently being processed.
- Approved/Meets – Applicant was marked as “Meets Guidelines.”
- FCRA3/Not Approved – Applicant was marked as “Does Not Meet Guidelines.”
ETA Tool
The ETA Date appears in the third column of your Order List once processing has begun.
The ETA displays the expected completion date.
If the ETA appears red, the order has exceeded the estimated completion time.
For more detailed information, click the applicant’s name to view order details.
 |  |
Details:

Sorting
You can easily organize your list by clicking the arrow icons at the top of any column:
Click once to sort in ascending order.
Click again for descending order.
By default, orders are listed by Order Date (newest to oldest).
You may also sort by:
Name
Order Date
ETA Date
Package
Requestor
Product
Status

Hiding
Administrative users have the option to hide completed background checks to simplify search results.
Check the box next to the applicant’s name.
Click the Green Checkmark to hide. (You can select multiple at once.)
To locate hidden results later, enable “Include Hidden” in your search filters.
Note: Only completed background checks can be hidden.


Viewing Results
There are two ways to view background checks:
Click the Status to open the report in a new window. If the status shows Complete, or Needs Decision, then the report has been completed.
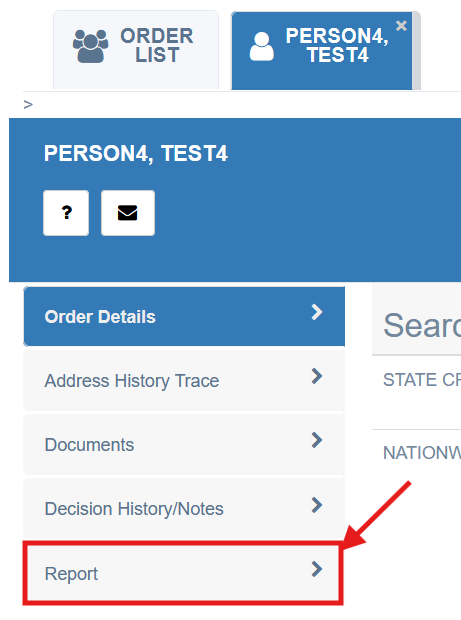
You may also click the applicant’s name, then select Report.
Making Decisions
If your account uses Policy Management, you’ll need to record a decision once a background check is complete.
Open the result.
At the top of the report, choose whether the applicant “Meets” or “Does Not Meet” your guidelines.
Click Change to save your decision.
Only Administrative users can make decisions.
Decisions must be made within 90 days of report completion. After 90 days, the option will no longer be available.


Where to Upload a Document
If a document is required to complete a background check, or you’d like to securely store a signed authorization form, follow these steps:
Click the applicant’s name.
Select Documents > Add/Remove Document.
This is the most secure way to share documents.
⚠️ Do not email unsecured documents containing Personal Identifying Information (PII) such as Date of Birth or Social Security Number.

Finding an Authorization/Release Form
If your organization uses Secure Volunteer, Secure Applicant, or Applicant Express, you can easily locate an applicant’s signed authorization form:
Click the applicant’s name under Background Check Orders.
Look under Account Actions and click View Release.
In some cases, this form may also be available under the Documents section.

Applicant Actions
- A few helpful actions are available by clicking the applicant’s name.
- The Question Mark allows you to easily submit a support request regarding that applicant.
- The Envelope allows you to email the applicant.
- If the applicant has applied through Secure Volunteer/Secure Applicant, an Edit button will be available to allow you to update their email address, or mailing address.

Secure Volunteer/Secure Applicant Actions
Account Administrators have additional management options, including:
Viewing expiration dates
Resending approvals
Adding or changing locations
Suspending an account
Only Administrators can suspend a volunteer and view the suspension reason.
Other users will only see a notice of suspension.
All these actions can be accessed by clicking the applicant’s name in Aegis.

If you have any questions, or need further assistance, please reach out to us at clientservices@bchex.io.
Was this article helpful?
That’s Great!
Thank you for your feedback
Sorry! We couldn't be helpful
Thank you for your feedback
Feedback sent
We appreciate your effort and will try to fix the article